Set up and use Moyafa: start here
Choose the task you want to complete: connections, messages, AI, orders, returns, your team or reports.
- 1
Start with your workspace and permissions
Check the workspace name before changing anything. Owners and authorized team members configure the business; staff only see the tools permitted by their role. Some tools also depend on your plan, business type and connected services. Reading these guides is available to everyone; a guide does not activate a feature.
- 2
Connect your channels and store
Use the guide for your platform, then verify a real product/order or a message from a phone you control. Review the connection state before enabling automatic sends.
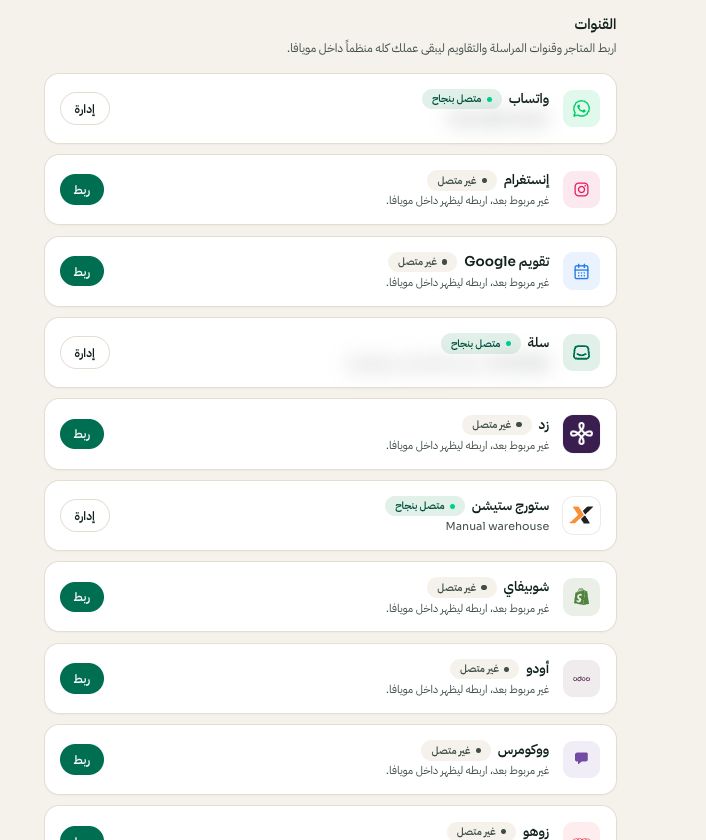
Settings → Channels: choose the platform, then Connect or Manage. Arabic interface shown; use the corresponding labels in your chosen language. Your available options and saved values may differ. Open the image to enlarge. - 3
Prepare replies and customer messages
Set up your assistant and approved knowledge, learn manual sending, then configure each automation separately. Approving a template does not assign it to an event.
- 4
Set policies and operational follow-up
Returns, warehouse connections and customer notification rules are separate settings. Start with your policy, review the customer form, then test the intended journey using your own test customer.
- 5
Grow and manage the business
Review audiences and consent before campaigns, then use reports to inspect recorded outcomes. Configure who can see financial information before inviting staff.