Filter customers and build accurate audiences
Use purchased products, last-order dates, tags and consent from actual synced records.
- 1
Check the source data first
Sync customers, orders and products from the connected store. Imported contact details alone do not supply purchase history. Check a known customer's order and product before relying on a purchased-product filter. Missing history is unknown data, not proof that the customer never purchased.
- 2
Choose conditions and inspect results
In Customers or the campaign audience builder, choose the available product, last-purchase, city, tag and other conditions. Use the connected product picker rather than a guessed name. Check whether combined conditions mean all or any, then inspect the matching contacts and count.
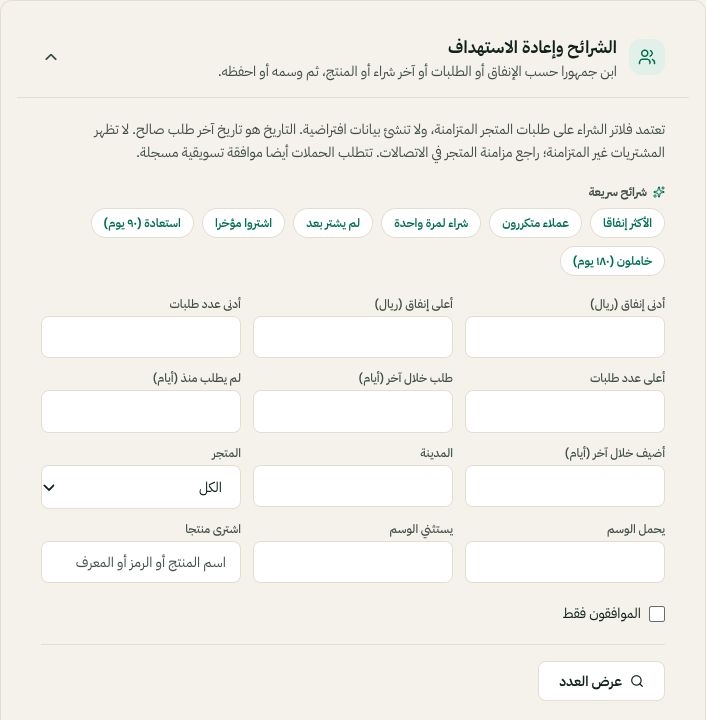
Audience rules use purchase, order-date, product and consent filters. Arabic interface shown; use the corresponding labels in your chosen language. Your available options and saved values may differ. Open the image to enlarge. - 3
Save and reuse where your plan allows
Name a saved segment clearly, including the product and period. It evaluates the available records; the audience can change after later syncs or purchases. Recheck the recipient preview immediately before sending a campaign.
- 4
Keep marketing permission separate
An order, tag or imported phone is not by itself marketing permission. Campaign eligibility also depends on consent and opt-out status. Configure store permission evidence only for wording customers actually accepted; never mark an unverified list as opted in.